Theme Customization Manual
LIQUID PRESS MAUNAL-
How to Customize
This section explains basic customization methods. The available settings vary by theme.
Other manuals
-
Icon Fonts
You can use beautiful icon fonts.
Simply specify a class name to display an icon.
For a list of available icons and their class names, please see here.
Example: <i class="icon-home"></i> Icon → Icon
To display an icon in a menu, specify the label as shown below.
Example: <i class="icon-mail"></i> Contact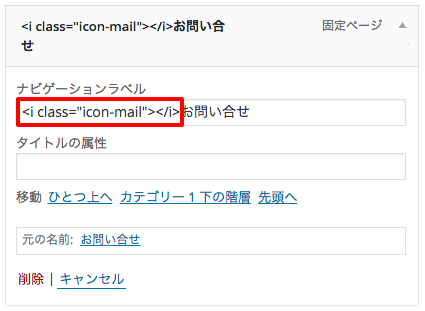
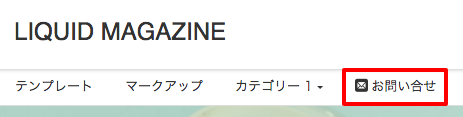
Note that when using this in a widget, HTML tags cannot be used in the "Title," so please enter it in the "Content" field instead.
Content:<div class="ttl"><i class="icon icon-mail"></i> Contact</div> -
Editing Widgets
-
Recent Posts (with images)
Configure this at WordPress admin screen > Appearance > Customize > Widgets.
In the area where you want it displayed, select the "Recent Posts (with images)" widget and enter a title and the number of items to display.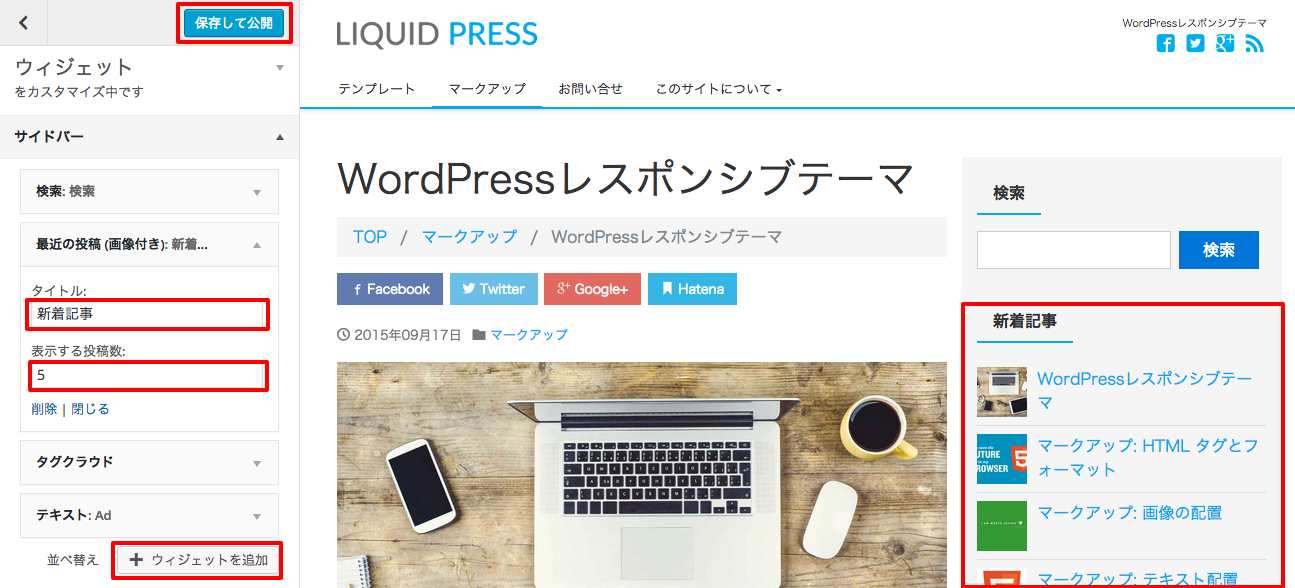
-
Facebook Page Like Box
Configure this at WordPress admin screen > Appearance > Customize > Widgets.
In the area where you want it displayed, select the "Facebook Page Plugin" widget and enter a title and the Facebook Page URL (not a personal Facebook page).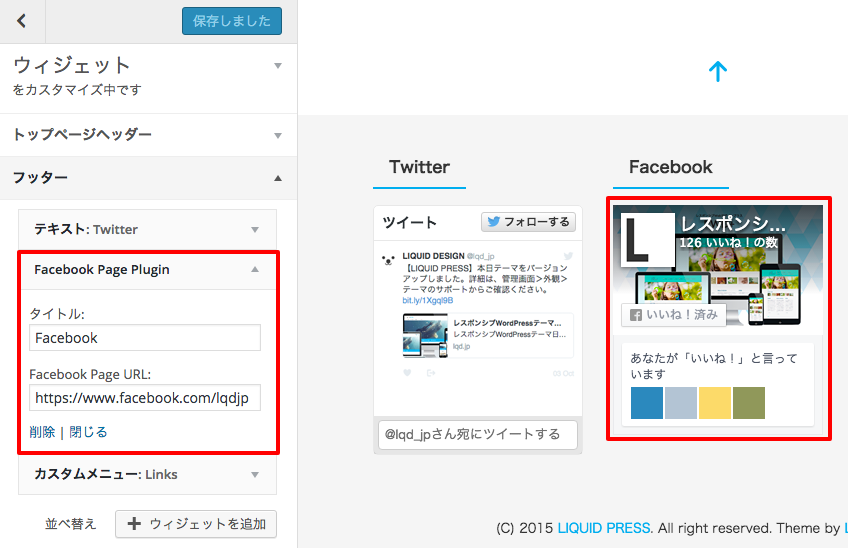 If you want to change how it is displayed, for example to show posts, get the code from the official Facebook Page Plugin site
(the one beginning with <div class="fb-page"...), then enter it in a "Custom HTML" widget and place it.
If you want to change how it is displayed, for example to show posts, get the code from the official Facebook Page Plugin site
(the one beginning with <div class="fb-page"...), then enter it in a "Custom HTML" widget and place it. -
Google AdSense
Configure this at WordPress admin screen > Appearance > Customize > Widgets.
In the area where you want it displayed, select a "Text" or "Custom HTML" widget, enter the ad code, and save.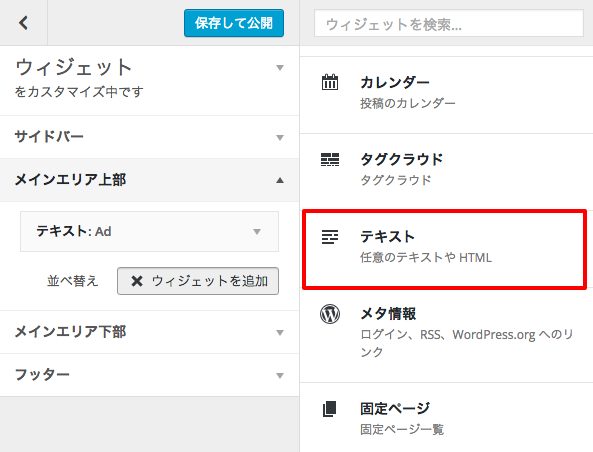
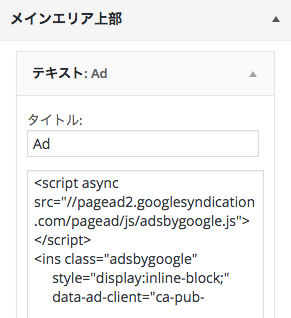 You can also place ads intuitively by using the
official Google AdSense plugin.
You can also place ads intuitively by using the
official Google AdSense plugin.
AdSense next-generation ads are supported as well. For details, please see here. -
Popular Posts (with images)
You can display these using the WordPress Popular Posts plugin.
Place and configure "WordPress Popular Posts" at WordPress admin screen > Appearance > Customize > Widgets. Nothing is displayed until traffic has been recorded.
Themes that support automatic popular post display allow even more flexible settings. For details, please see here.
Reference: the settings used on the demo site are as follows.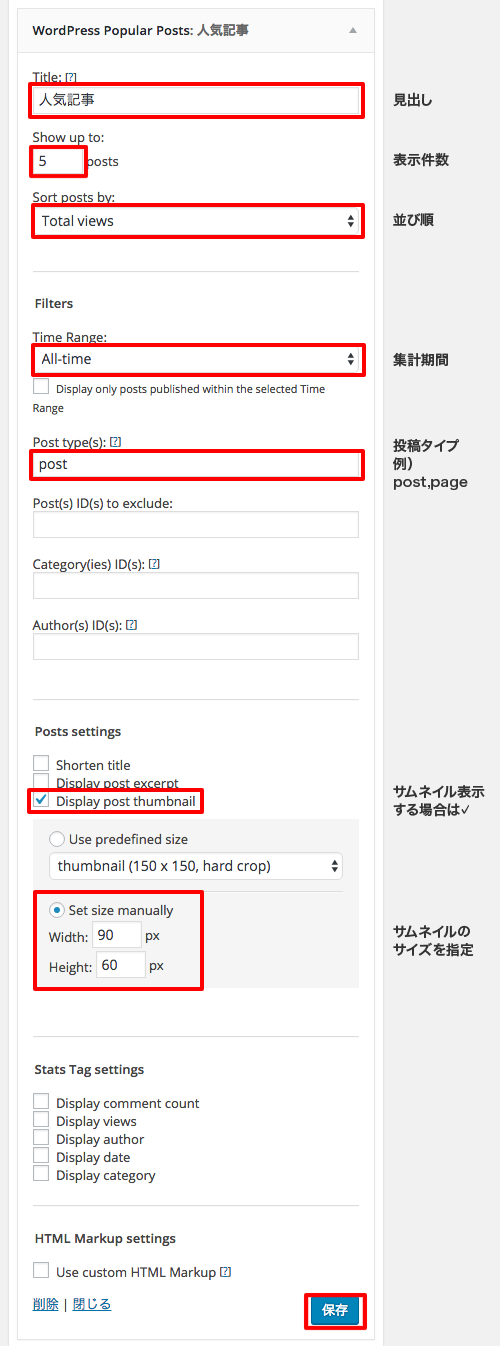
-
Body of a Static Page
You can display the body of a selected static page in a widget area.
Select a page you have already created and save.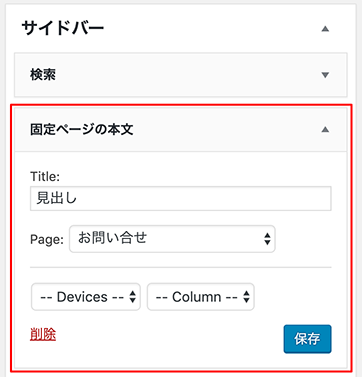
-
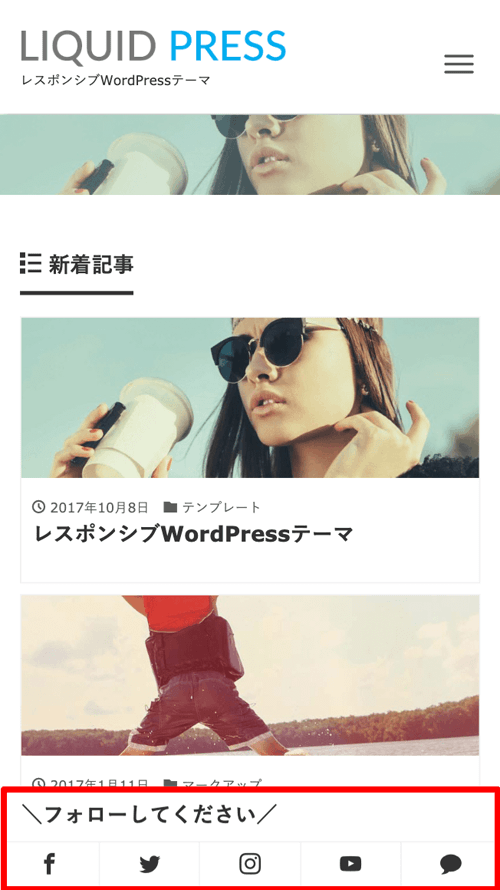
Fixed Footer
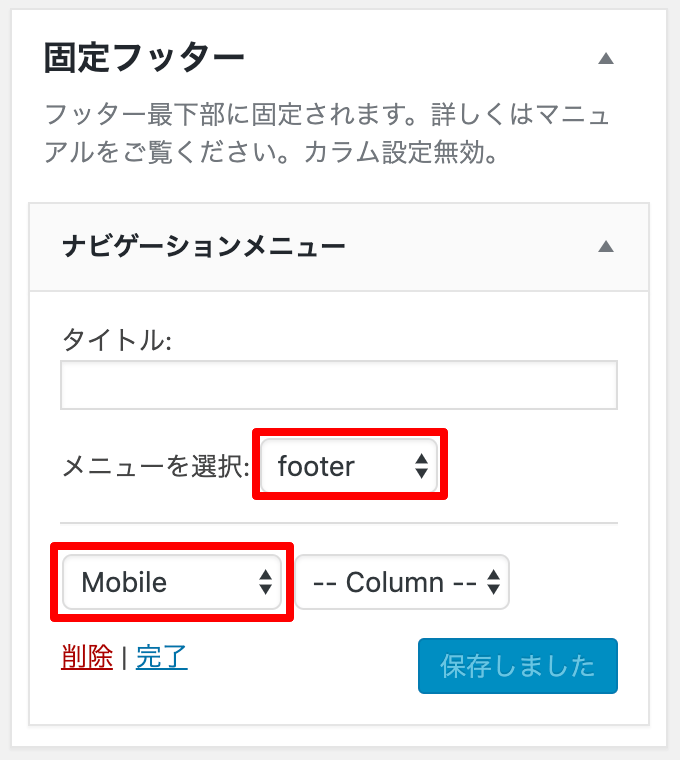
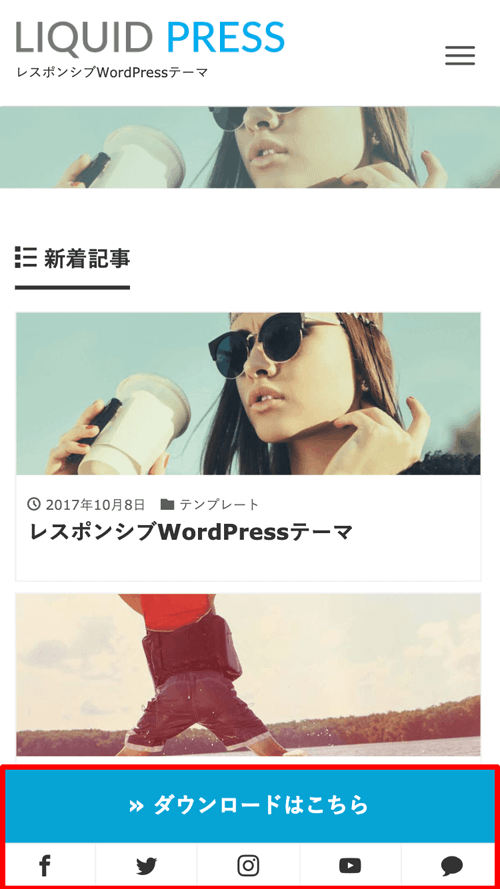
The menu location "Footer Menu," which is fixed to the very bottom of the footer, and widgets are both supported (on supported themes only).
For widgets, you can place "Navigation Menu" and "Image" widgets. Menu items are laid out at equal widths across the full width.
For how to configure the menu contents, please see here. You can also use the mobile/desktop switching feature to display it on mobile only.
Reference: the settings used on the demo site are as follows.Appearance > Widgets > Fixed Footer
Multiple widgets can be placed. It also works well for wide banner images and the like.
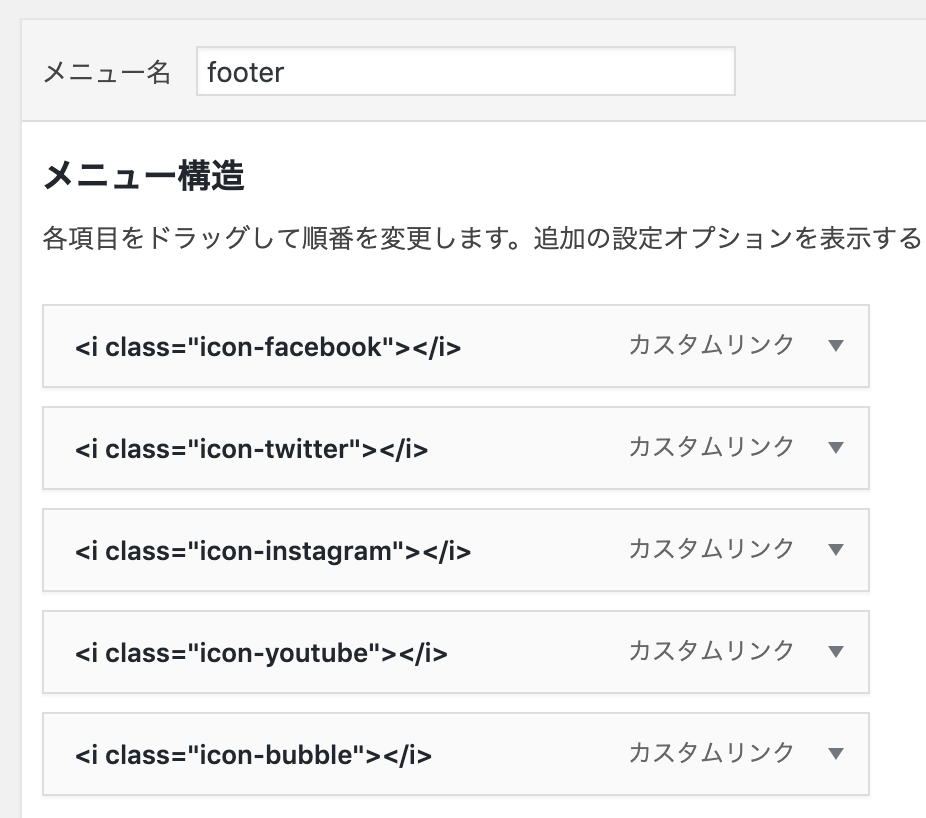
Appearance > Menus
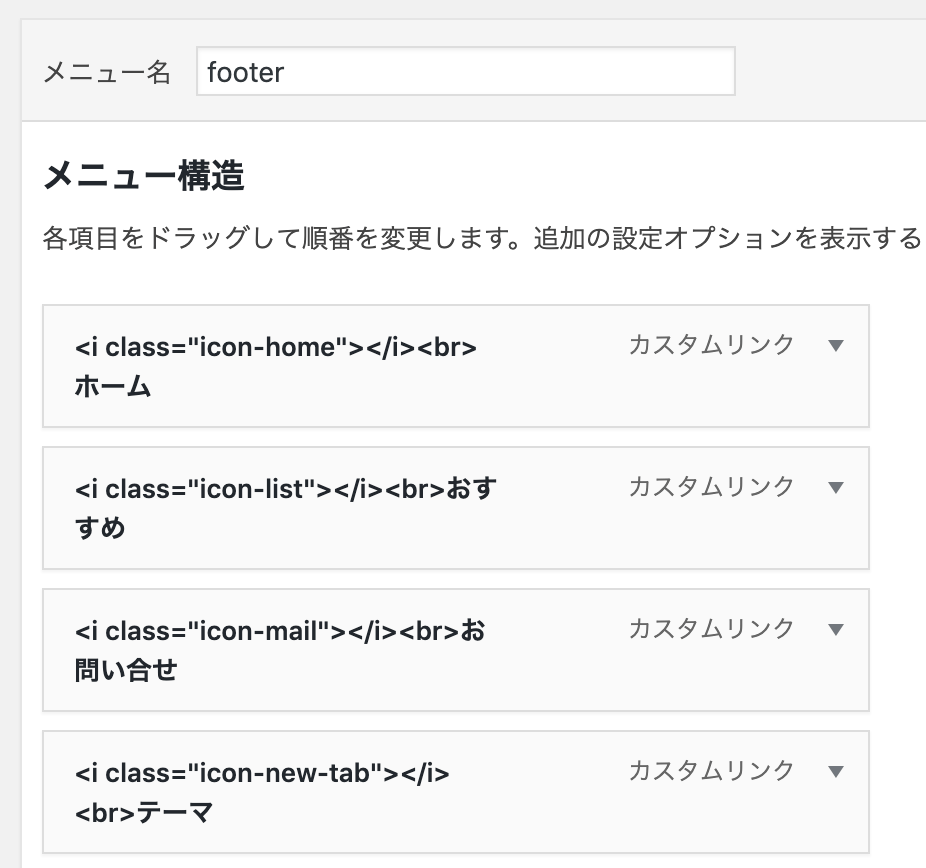
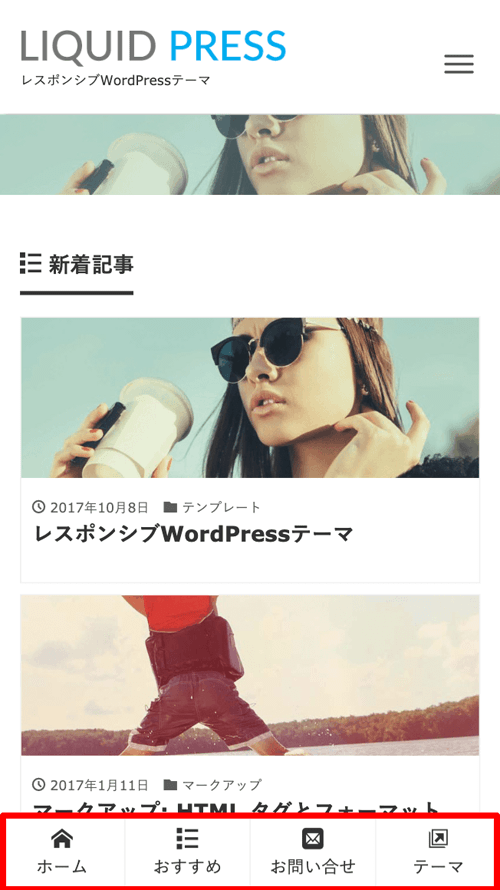
Reference: these are the settings for a menu that displays icons only. You can also add a widget title.
-
Special Header
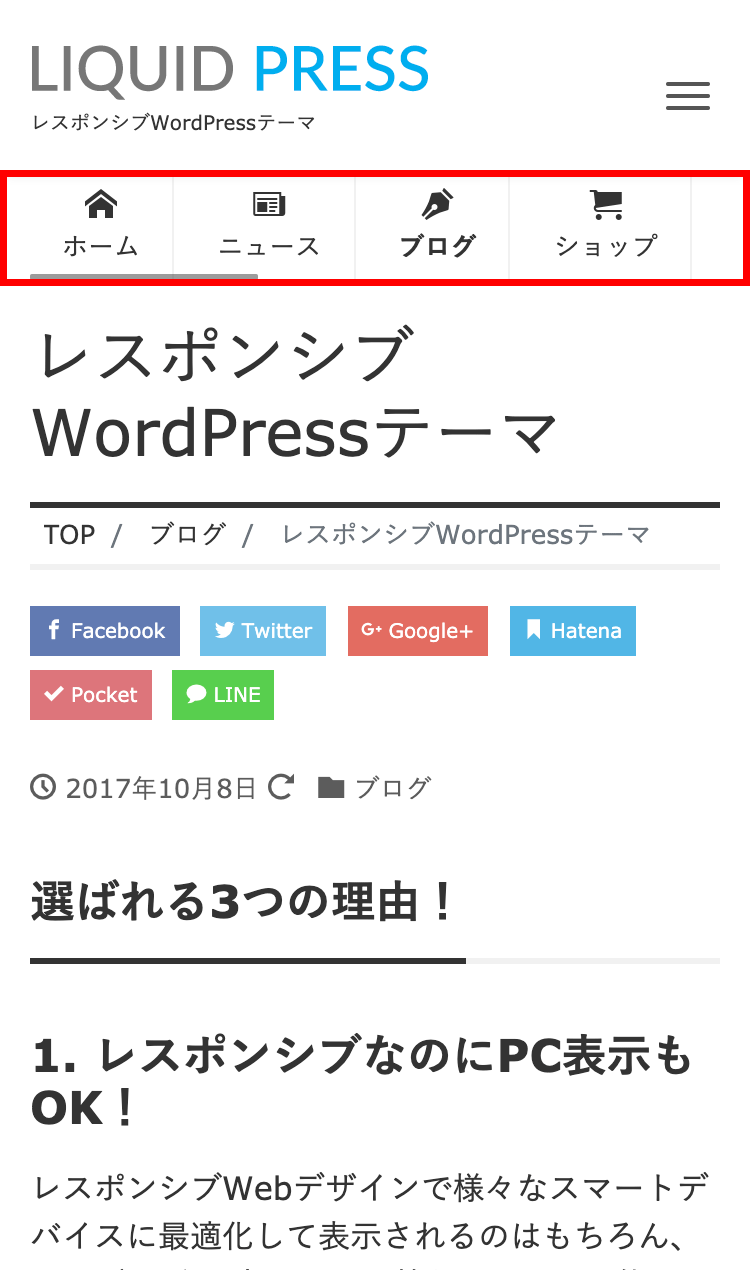
The menu location "Special Menu" and widgets that let you lay out the header freely are both supported (on supported themes only).
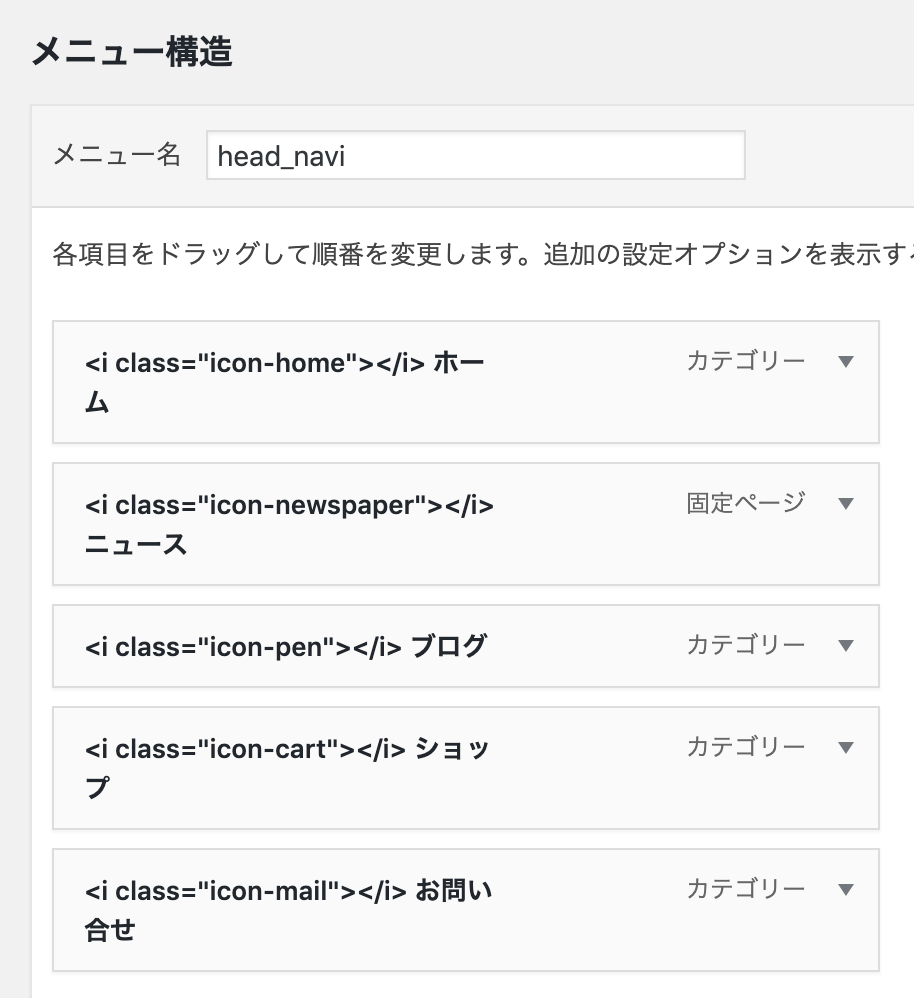
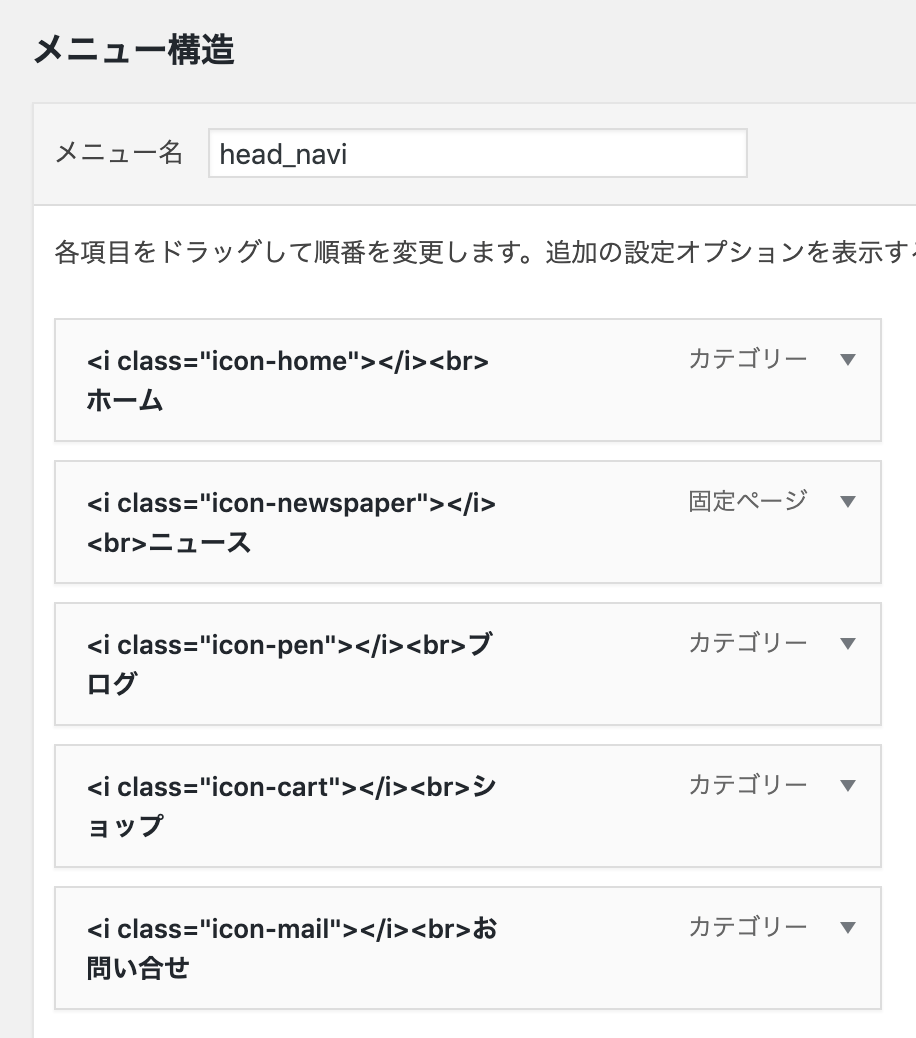
For widgets, you can place "Navigation Menu" and "Image" widgets. The menu becomes a horizontally scrolling menu. For how to configure the menu contents, please see here. You can also use the mobile/desktop switching feature to display it on mobile only.Appearance > Widgets > Special Header
Place widgets in the special header area.
It also works well for menus, search boxes, title text, wide banner images, and the like.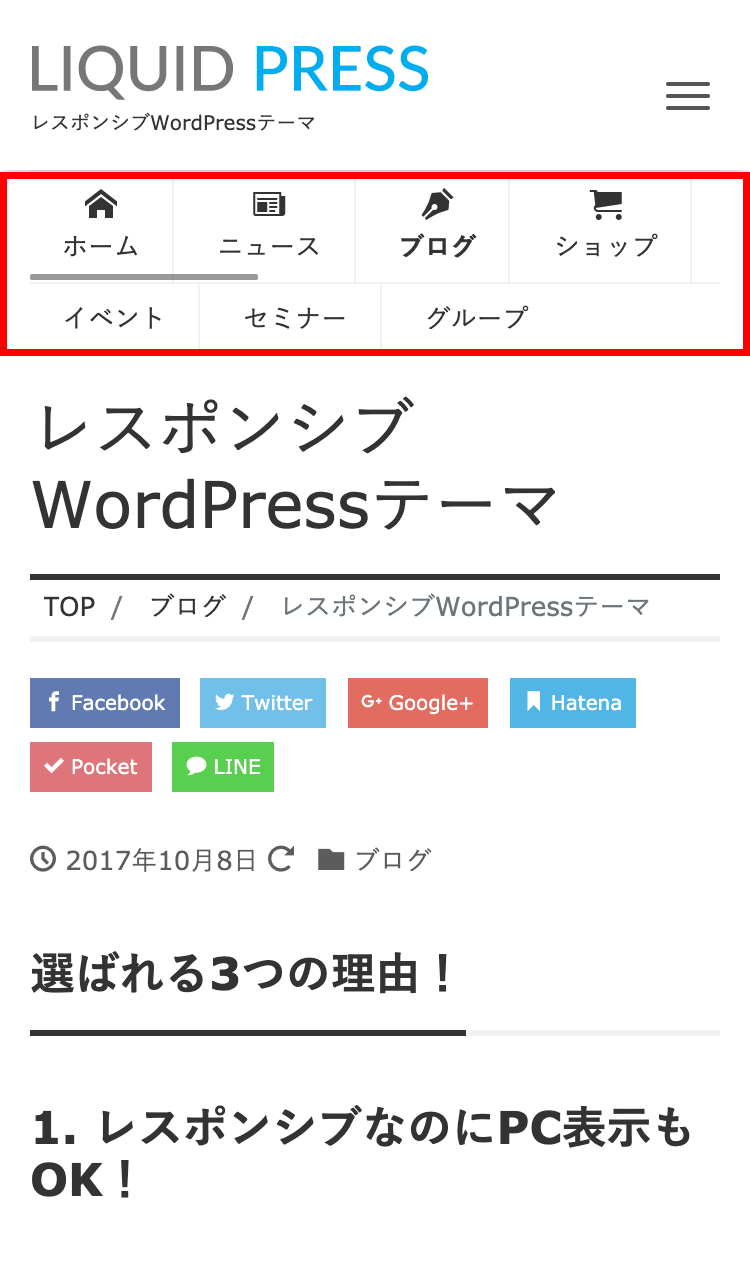
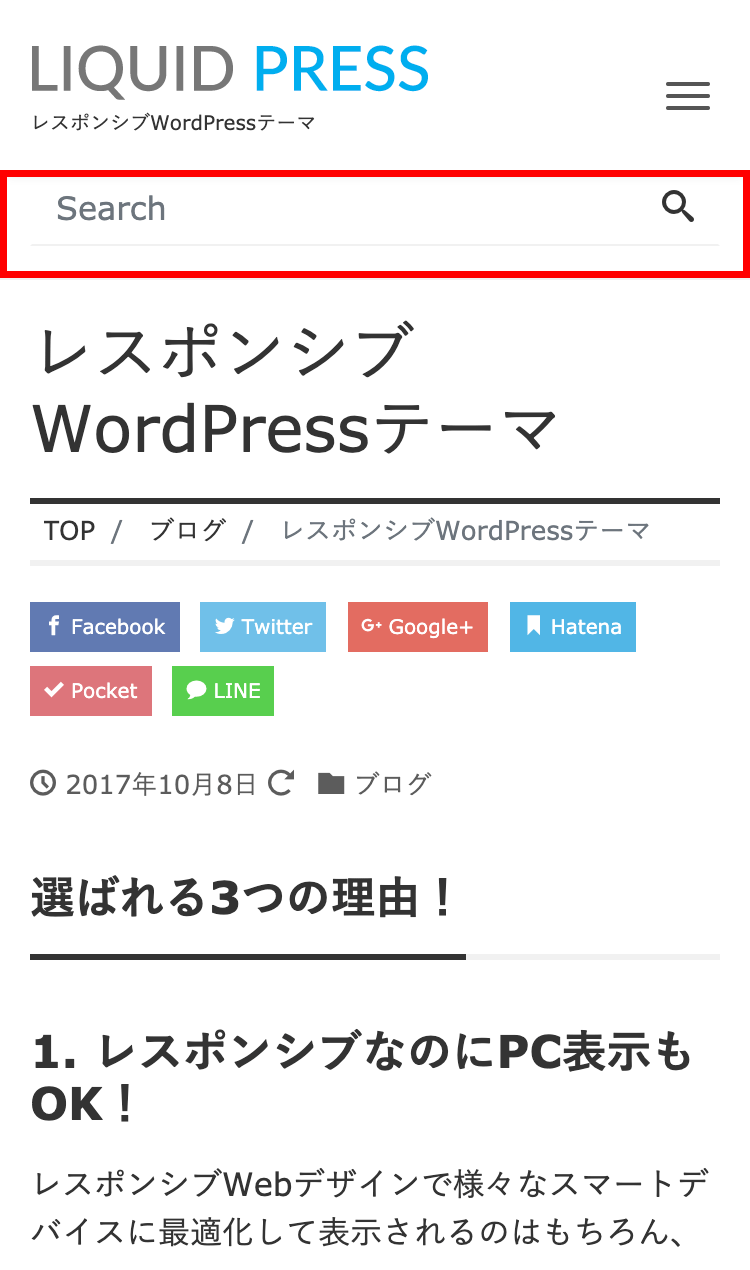
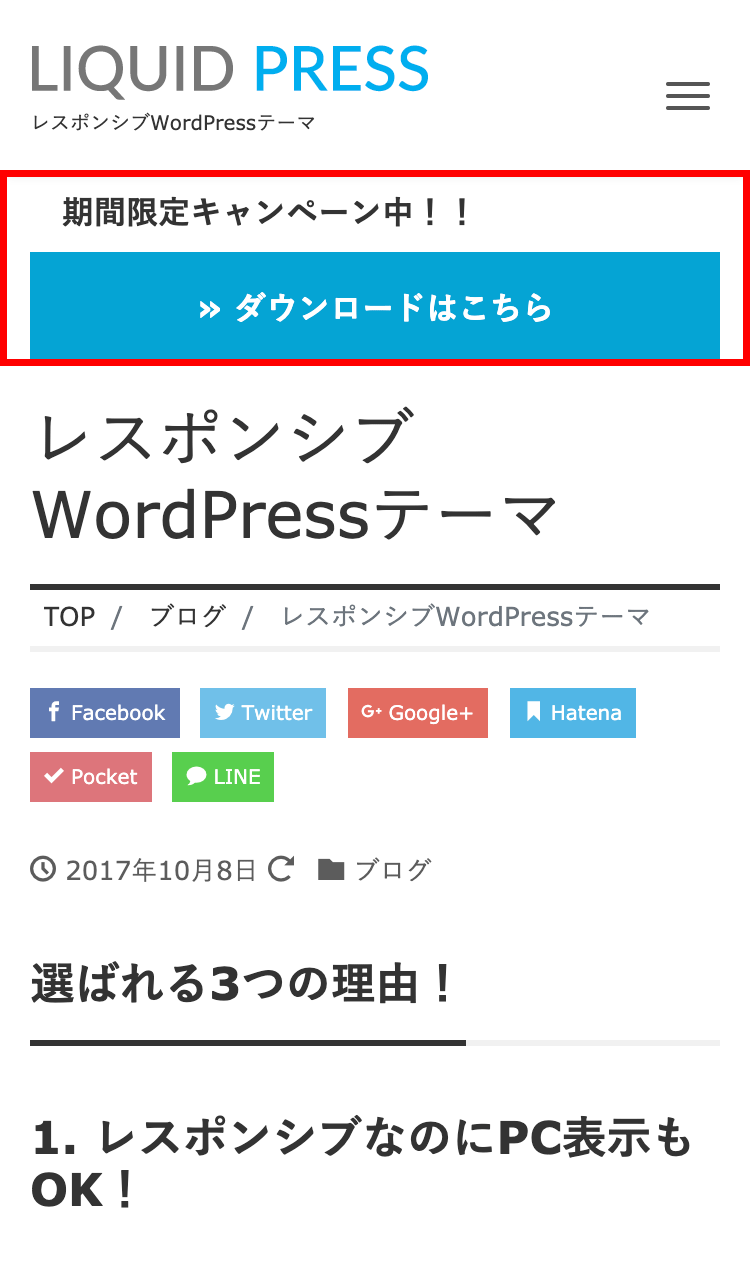
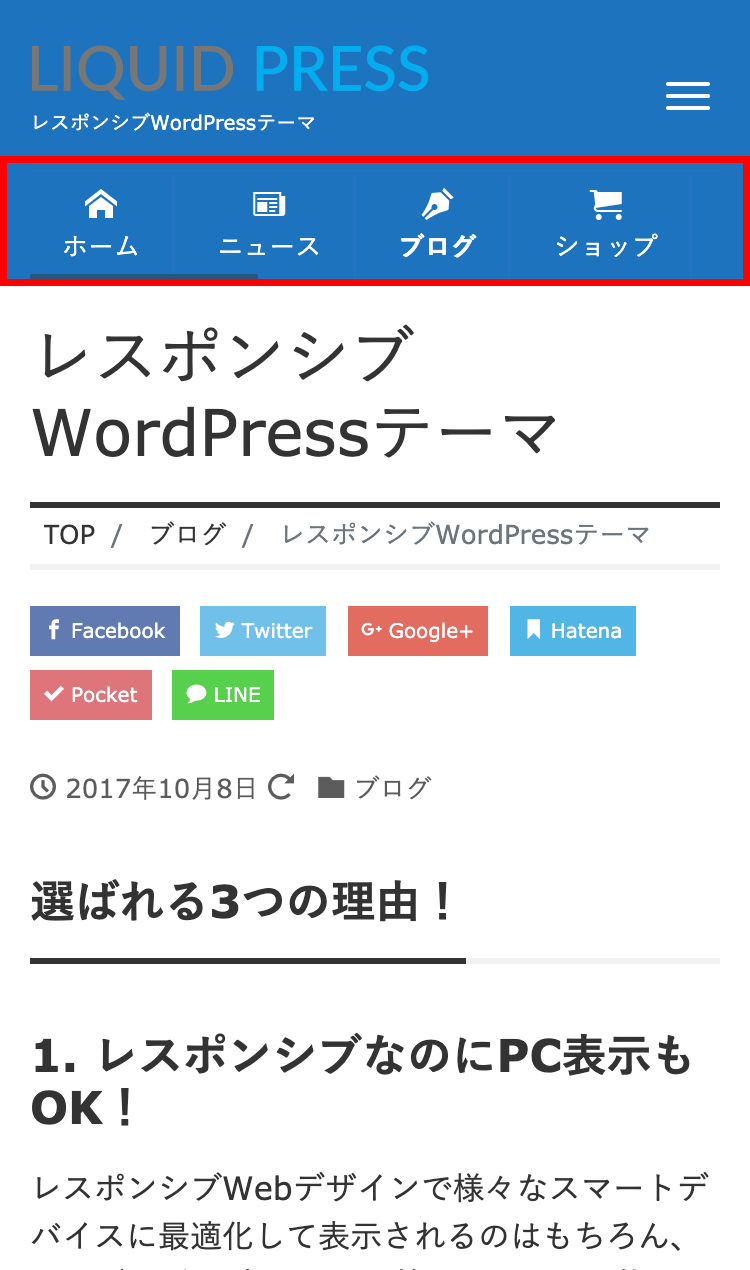
Appearance > Menus
Configuration example:
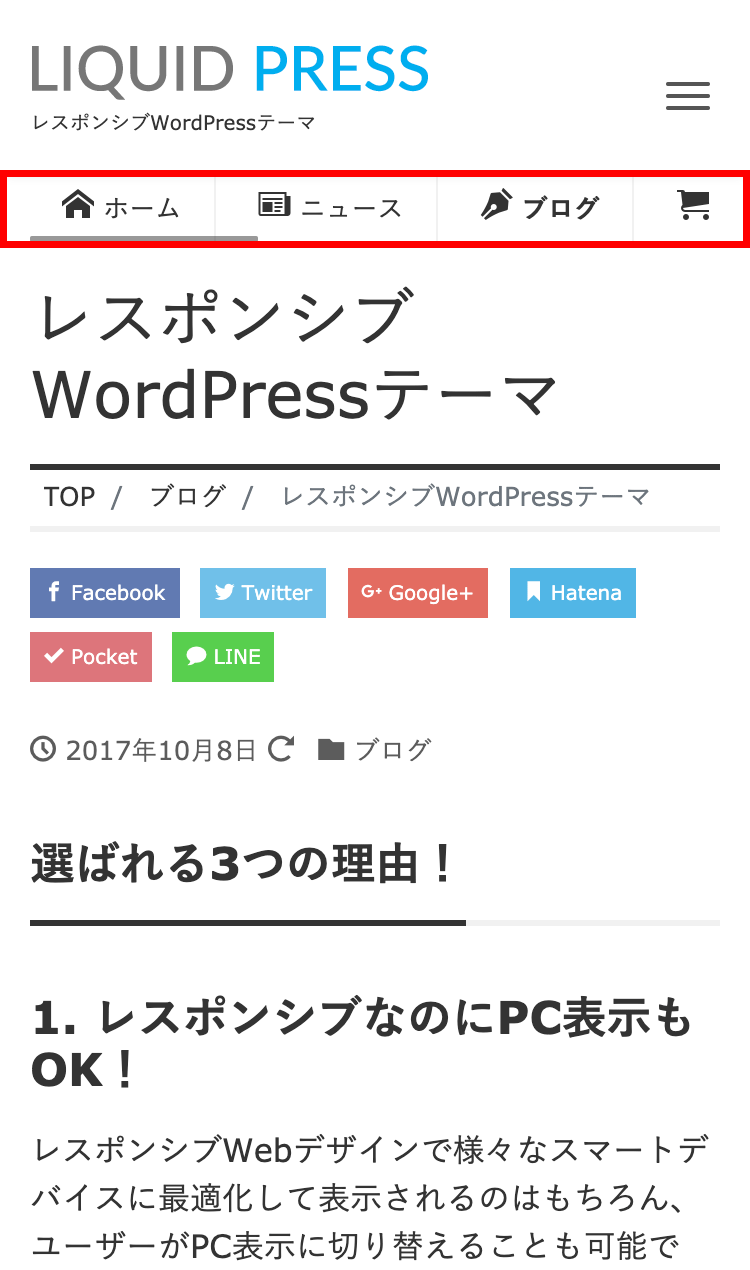
-
Drawer
The drawer is a widget area that appears when the menu is opened on a mobile device.
It is recommended for displaying banners with an image widget, among other uses. *The LIGHT theme does not support this.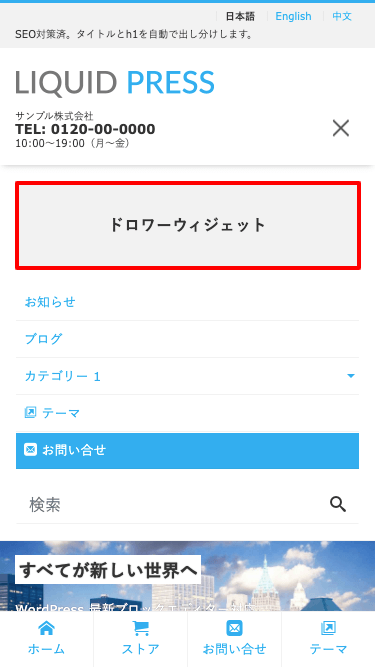
-
Plugins
-
Activating Plugins
You can manage and add plugins at WordPress admin screen > Plugins.
Plugins you want to use on your site must be activated.
We recommend activating "WP Multibyte Patch," the Japanese language support plugin, and "Akismet," the anti-spam plugin, both of which are installed from the start. -
How to Install a Plugin
At WordPress admin screen > Plugins, click "Add New."
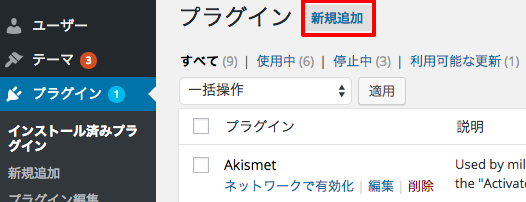 Enter the plugin name or similar and press Enter to search.
There are many similar plugins, so check the ratings, the number of installations, and whether it supports your version of WordPress. If everything looks fine, click "Install Now."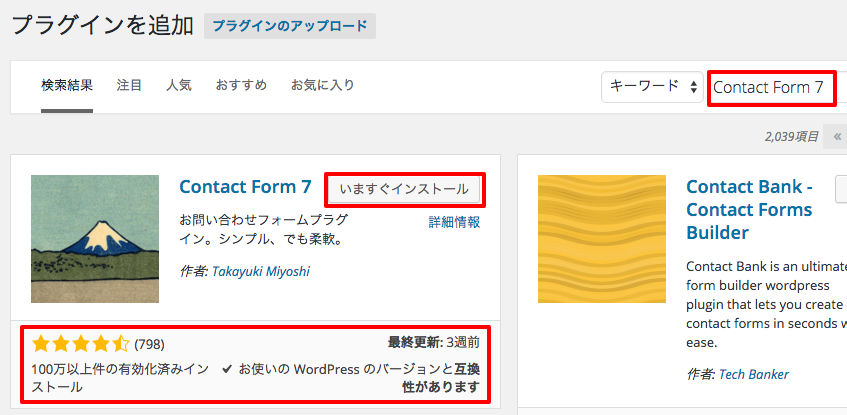 When it says the installation is complete, click "Activate Plugin." Installation is now finished.
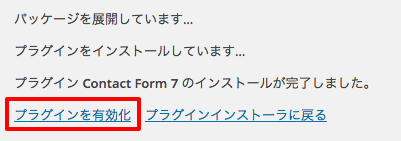
-
Theme Color
The theme color set in the color settings of the Customizer can be used through the CSS variables and class names below. This is handy when working with blocks or custom HTML. The theme color is also reflected in the color palette of the block editor.
CSS variable name Theme color --main-color
Example:CSS class Theme color background liquid_bg Theme color border liquid_bc Text color liquid_color <div class="liquid_bg">Content</div> -
Other
-
Twitter Cards
The theme supports Twitter Cards.
Twitter's approval is required in order to display Twitter Cards.
Log in to Twitter with the account used for the site, visit the URL below, and enter the URL of the site where the theme is active.
Card validator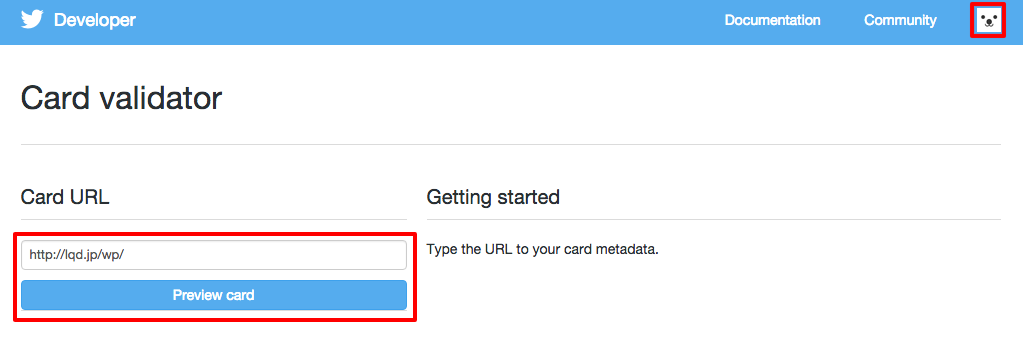 If there are no problems, a preview appears as shown below. Please also check it on Twitter itself.
If nothing is displayed, an old cache may remain, so try previewing several times.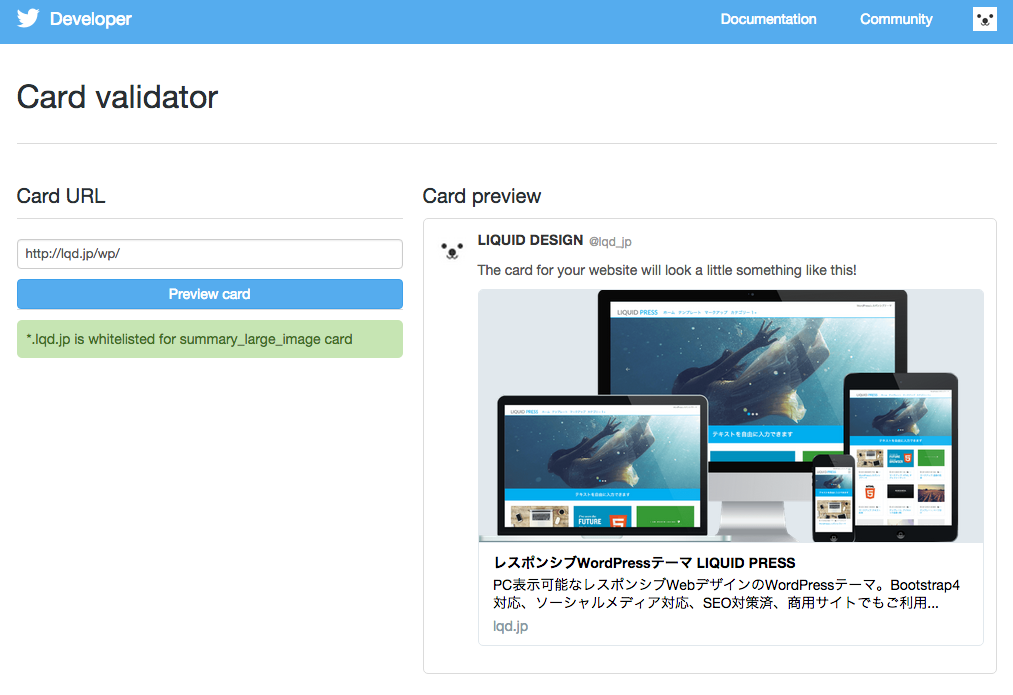
-
Google Maps
On themes that support Google Maps, you can easily enter the embed code from the Customizer.
Example:<iframe src="https://www.google.com/maps/embed?......" width="600" height="450" style="border:0" allowfullscreen></iframe>For how to obtain the Google Maps embed code, please see the official help below.
Maps Help